Chapter 7 : Managing Management
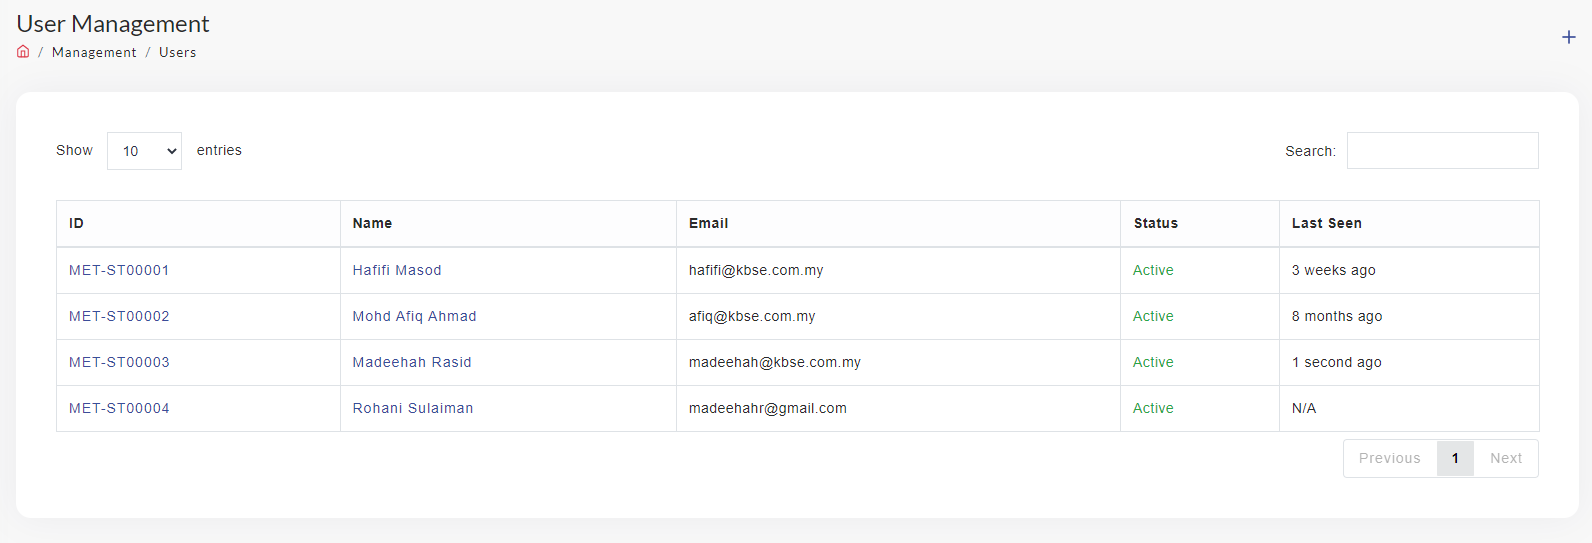
Users
To manage User which responsible to operate this system,
- Click Management
- Click Users. The User Management page will display as below:

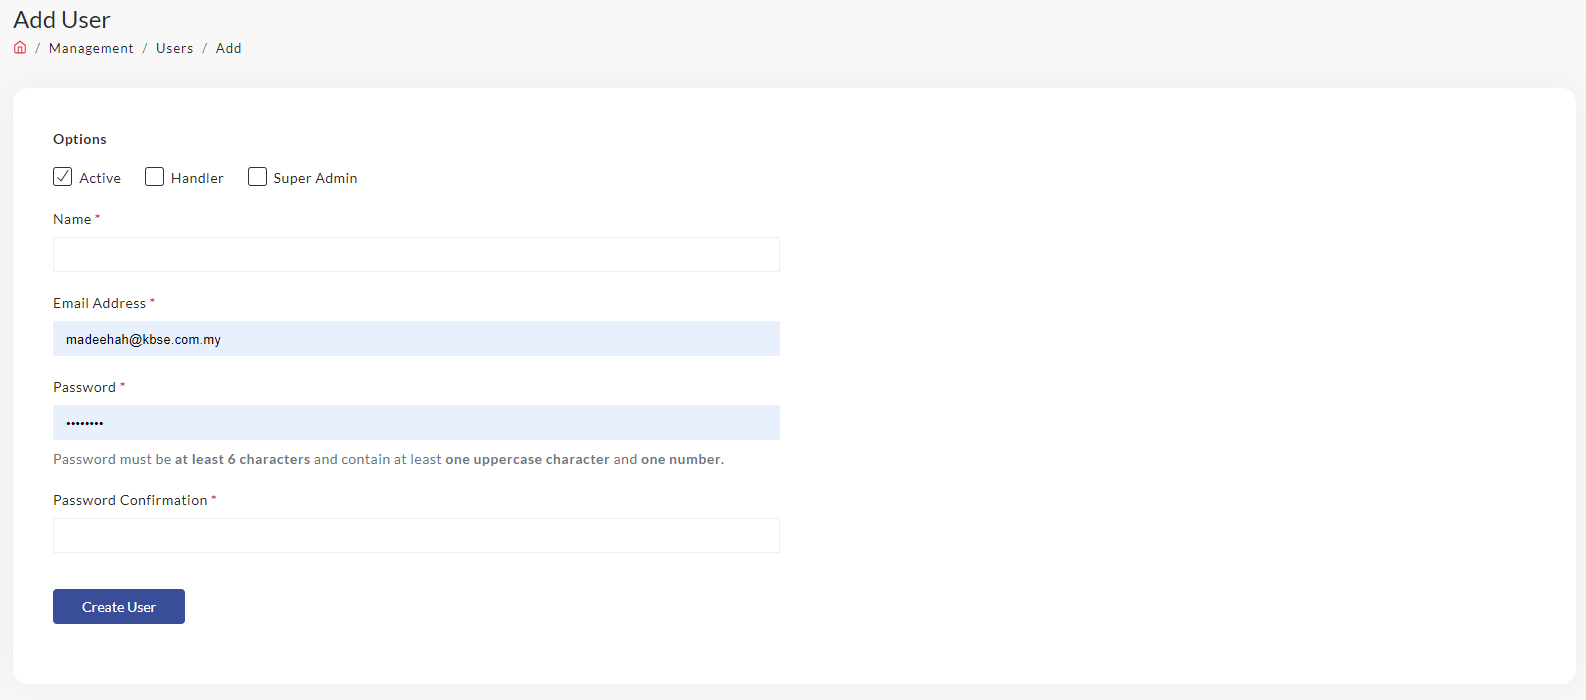
Add User
- Click +
- Add User page will display as below. Fill up the compulsory information (*) which is Name, Email Address and also Password. In case the user is Super Admin, click on Super Admin box. Then click Create User

- New User was added

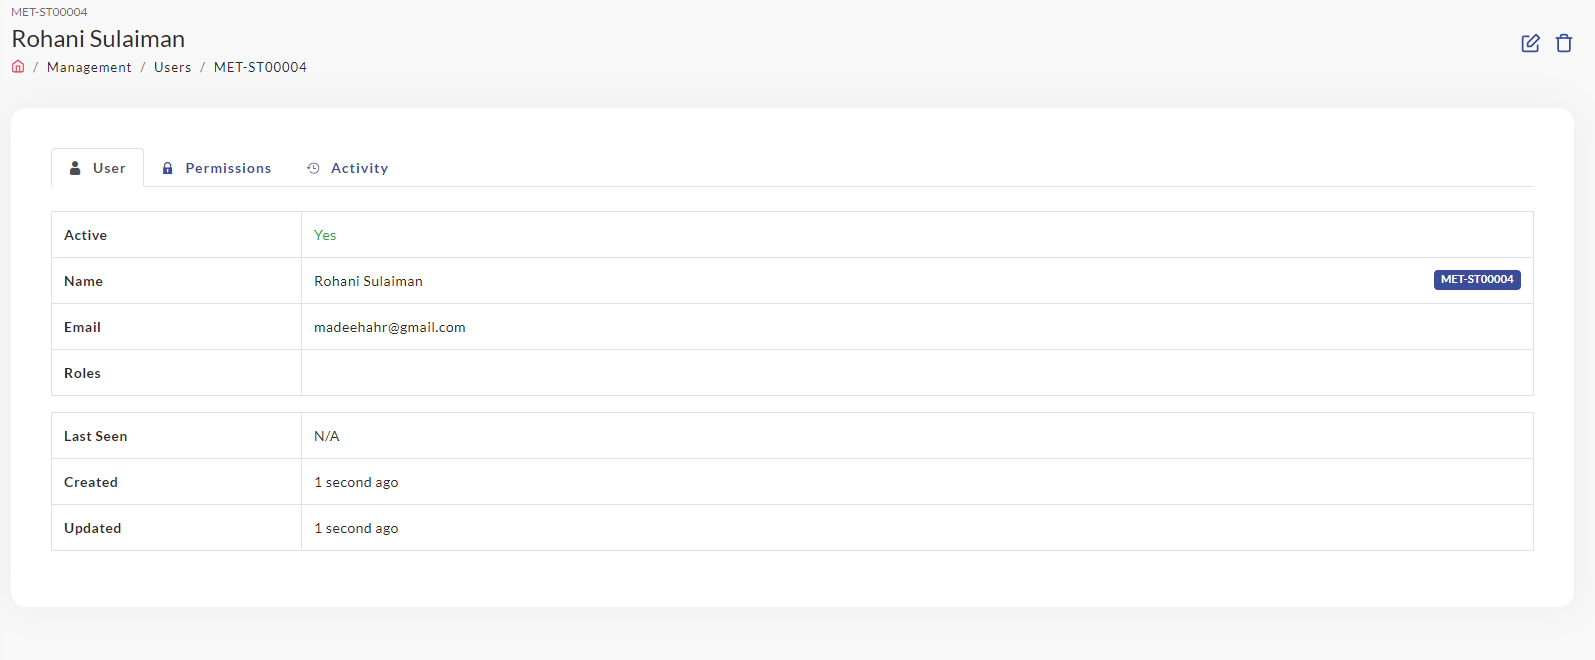
Set User Role
- To set user role, Click on User Name
- The user Profile will display as below:

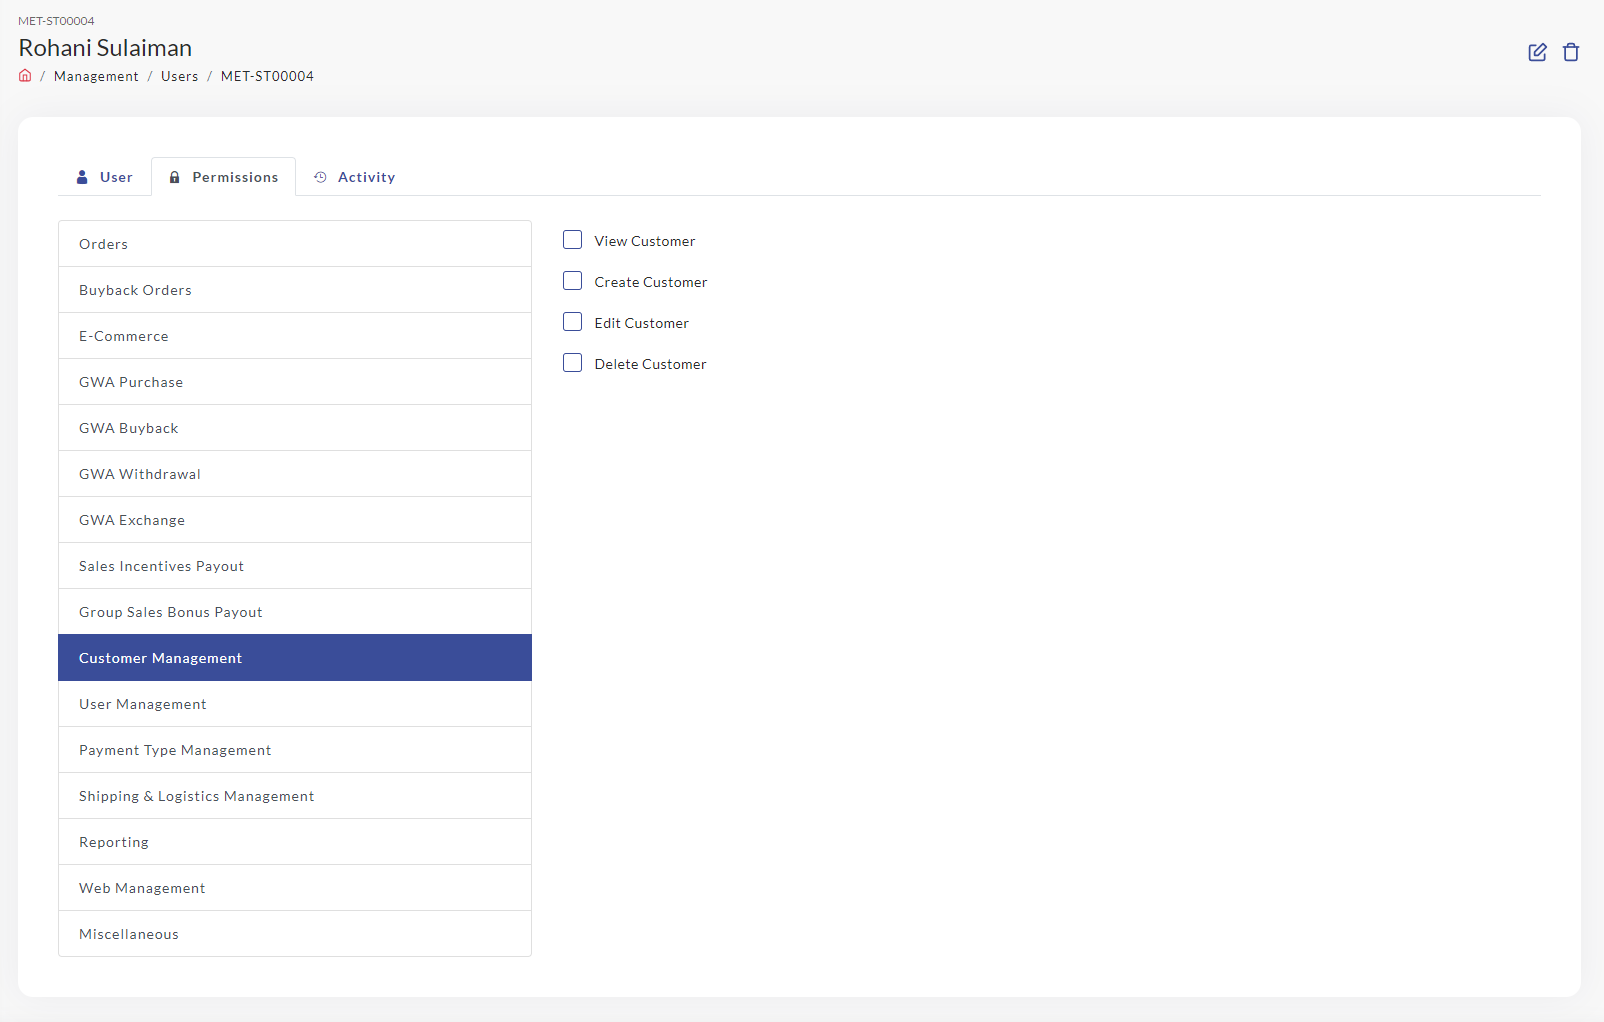
- Click Permission Tab. Click on which task we want to assign to the user based on department/ job scope.

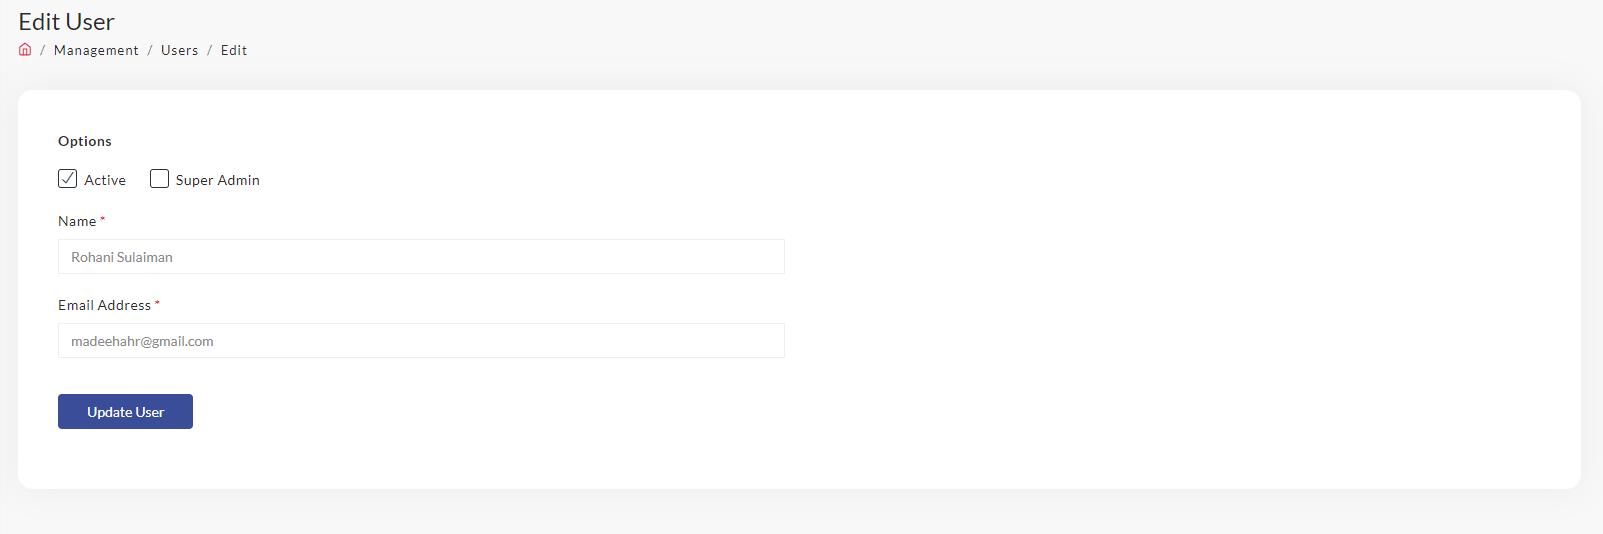
Edit User
- To edit user, Click

-
Edit either Name or Email Address, then click Update User
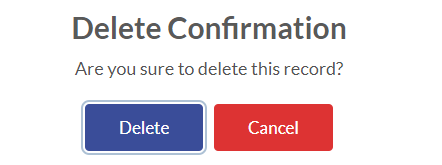
Delete User
- To delete user, Click

- Delete Confirmation pop up will appear, then Click Delete.
Gold Pricing
To manage the gold pricing( for e-commerce page),
- Click Management
- Click Gold Pricing
- Gold Pricing page will display as below. Admin can edit the buy Margin or Sell Margin and make sure to click on Fetch latest gold rates from Data Provider to make sure the gold rate been update automatically. Then click Save & Update Price

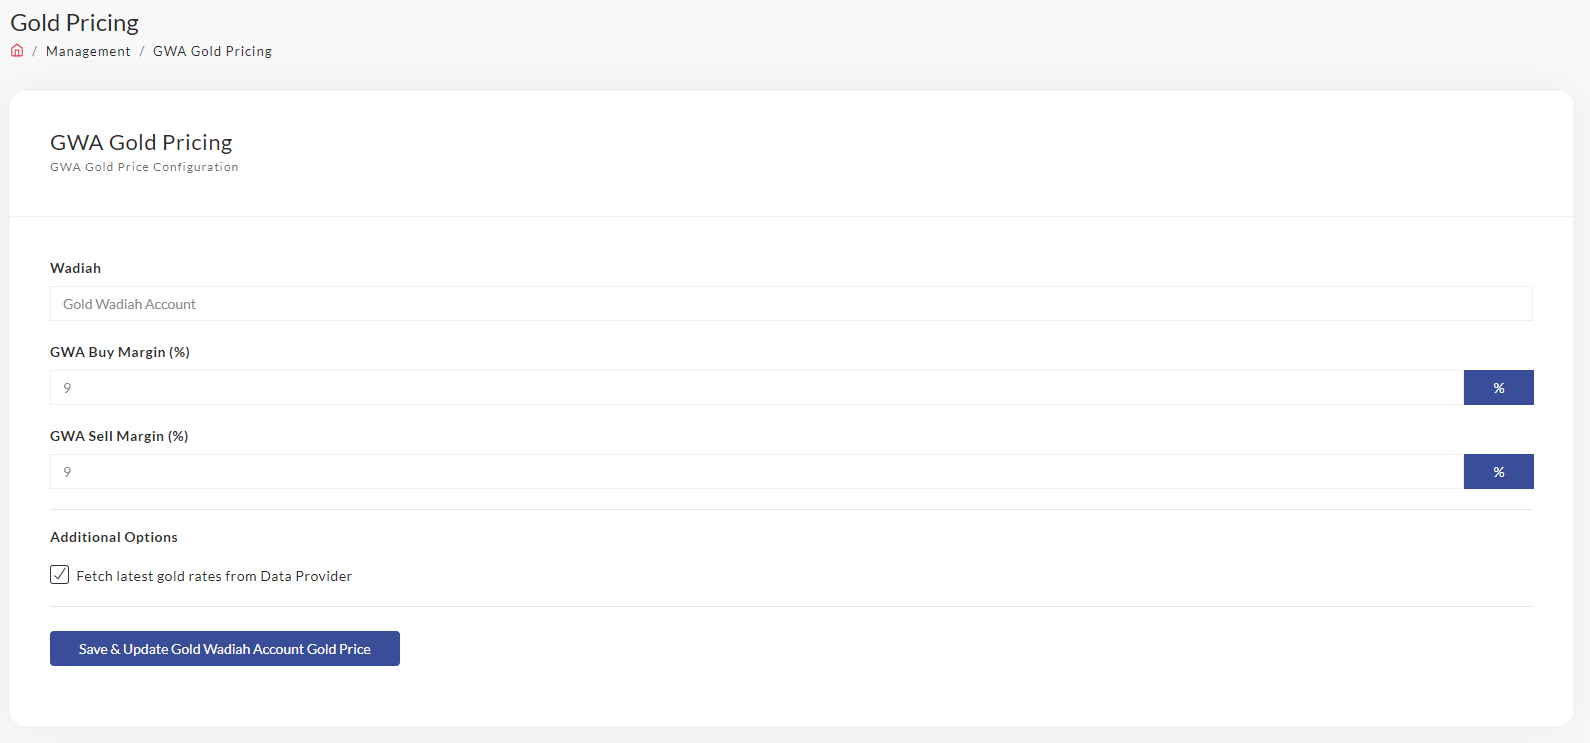
GWA Gold Pricing
To manage the gold pricing( for GWA page),
- Click Management
- Click GWA Gold Pricing
- GWA Gold Pricing page will display as below. Admin can edit the buy Margin or Sell Margin and make sure to click on Fetch latest gold rates from Data Provider to make sure the gold rate been update automatically. Then click Save & Update Gold Wadiah Account Gold Price
Payment Types
Admin can enabled or disable the payment type base on company's need
- Click Management
- Click Payment Types
- Payment Types page will display as below. Admin can edit the Status either to enable or disable the status by click on
 to enable the payment types or
  to disable the payment type.
-
The confirmation pop up will appear, Click Ok to proceed.


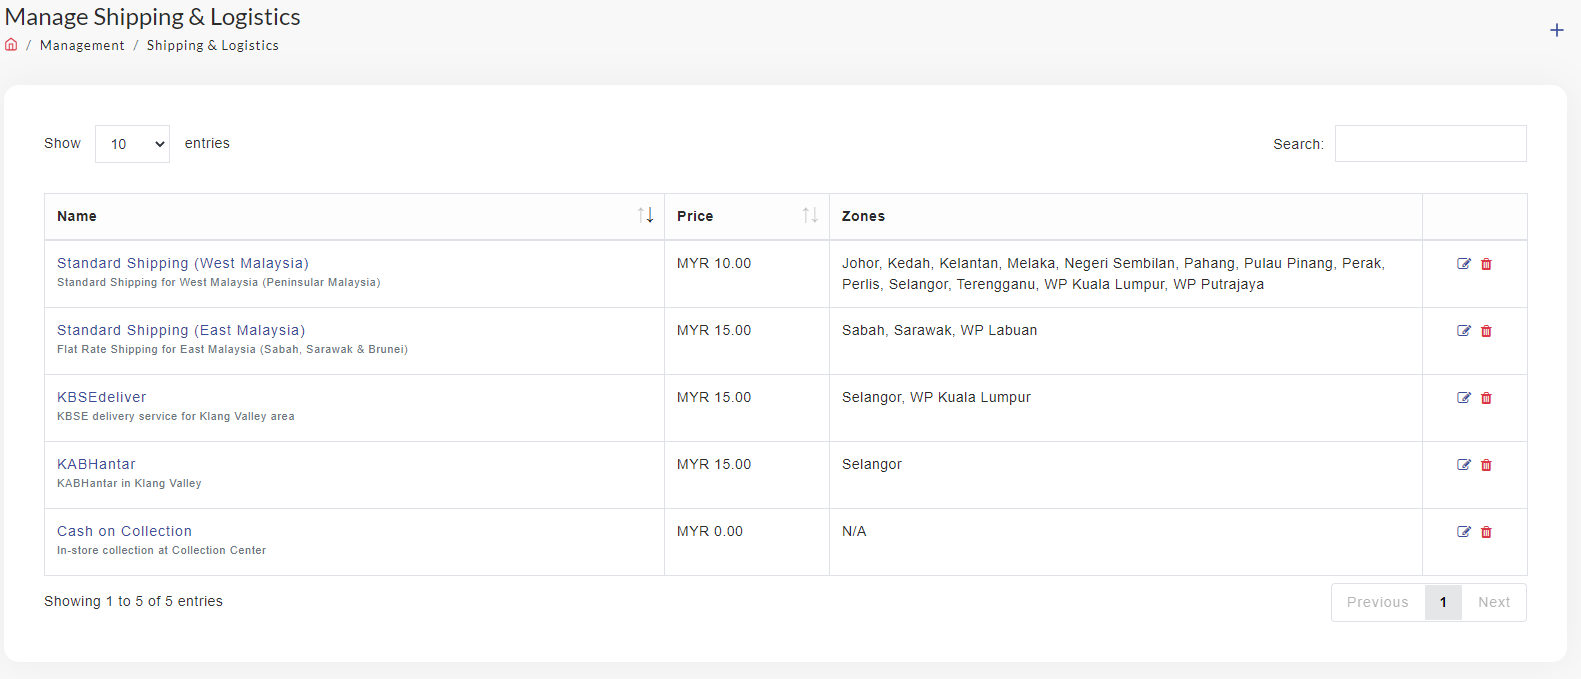
Shipping & Logistics
To manage shipping and logistics,
- Click Management
- Click Shipping & Logistics. The page Manage Shipping & Logistics will appear as below:

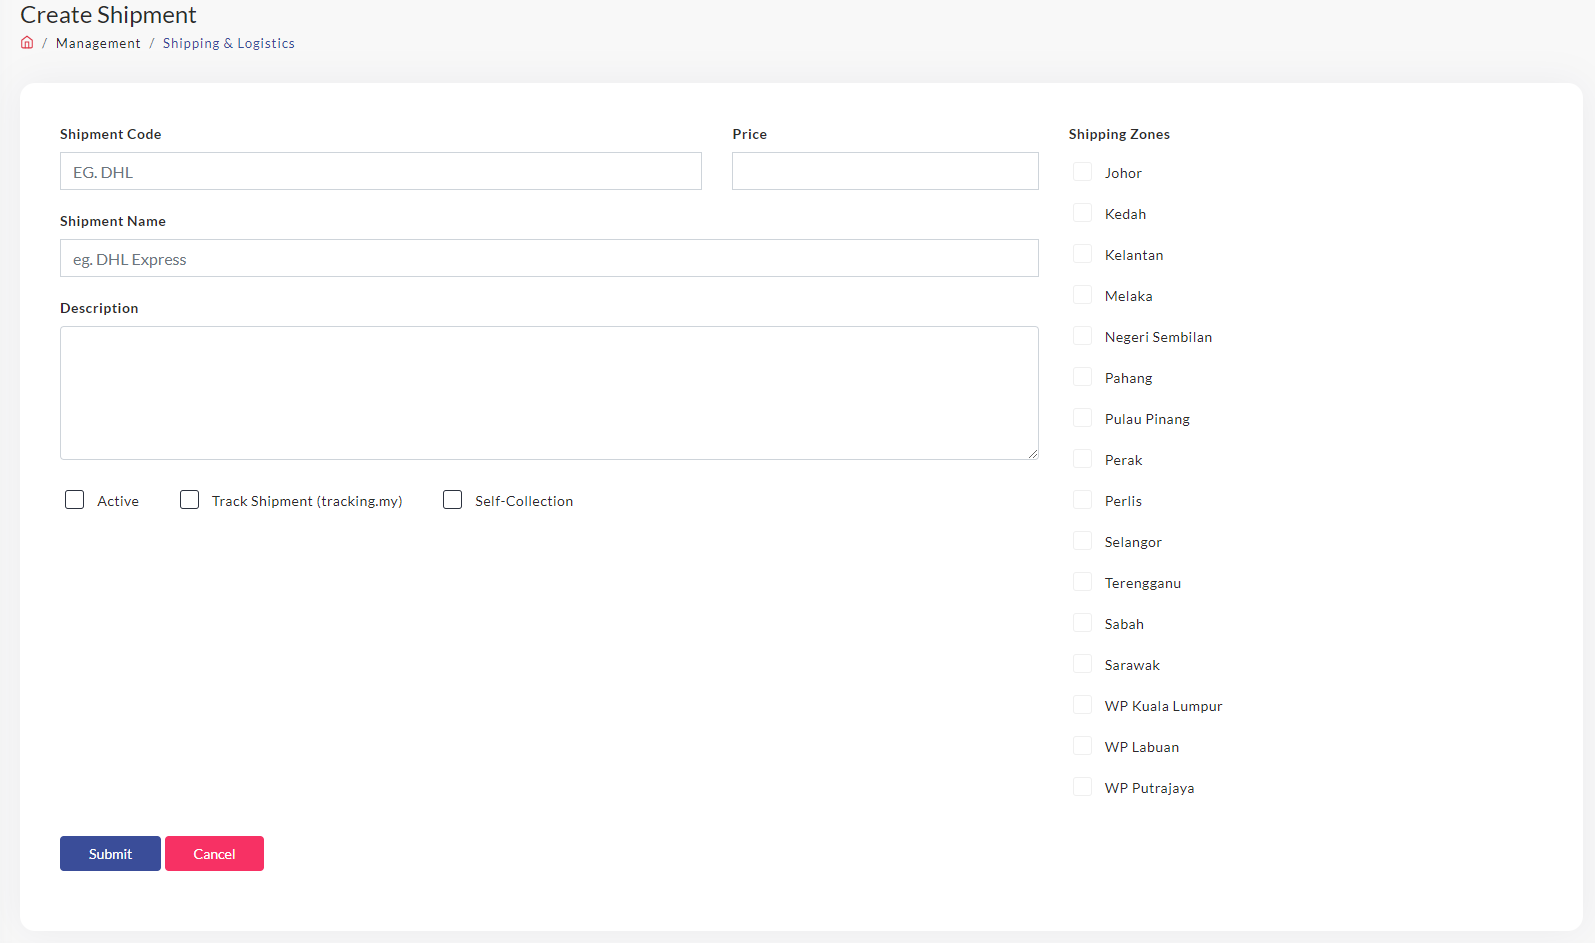
Create New Shipment
- Click +
- Create Shipment page will appear. Set a new shipment code,Shipment name and Price and click on the box either we want to activate that shipment (Active), Track Shipment or Self-Collection for the new shipment before set it up. Also user need to click shipping zone for that new shipment, based on the courier coverage. Then to proceed, click Submit.

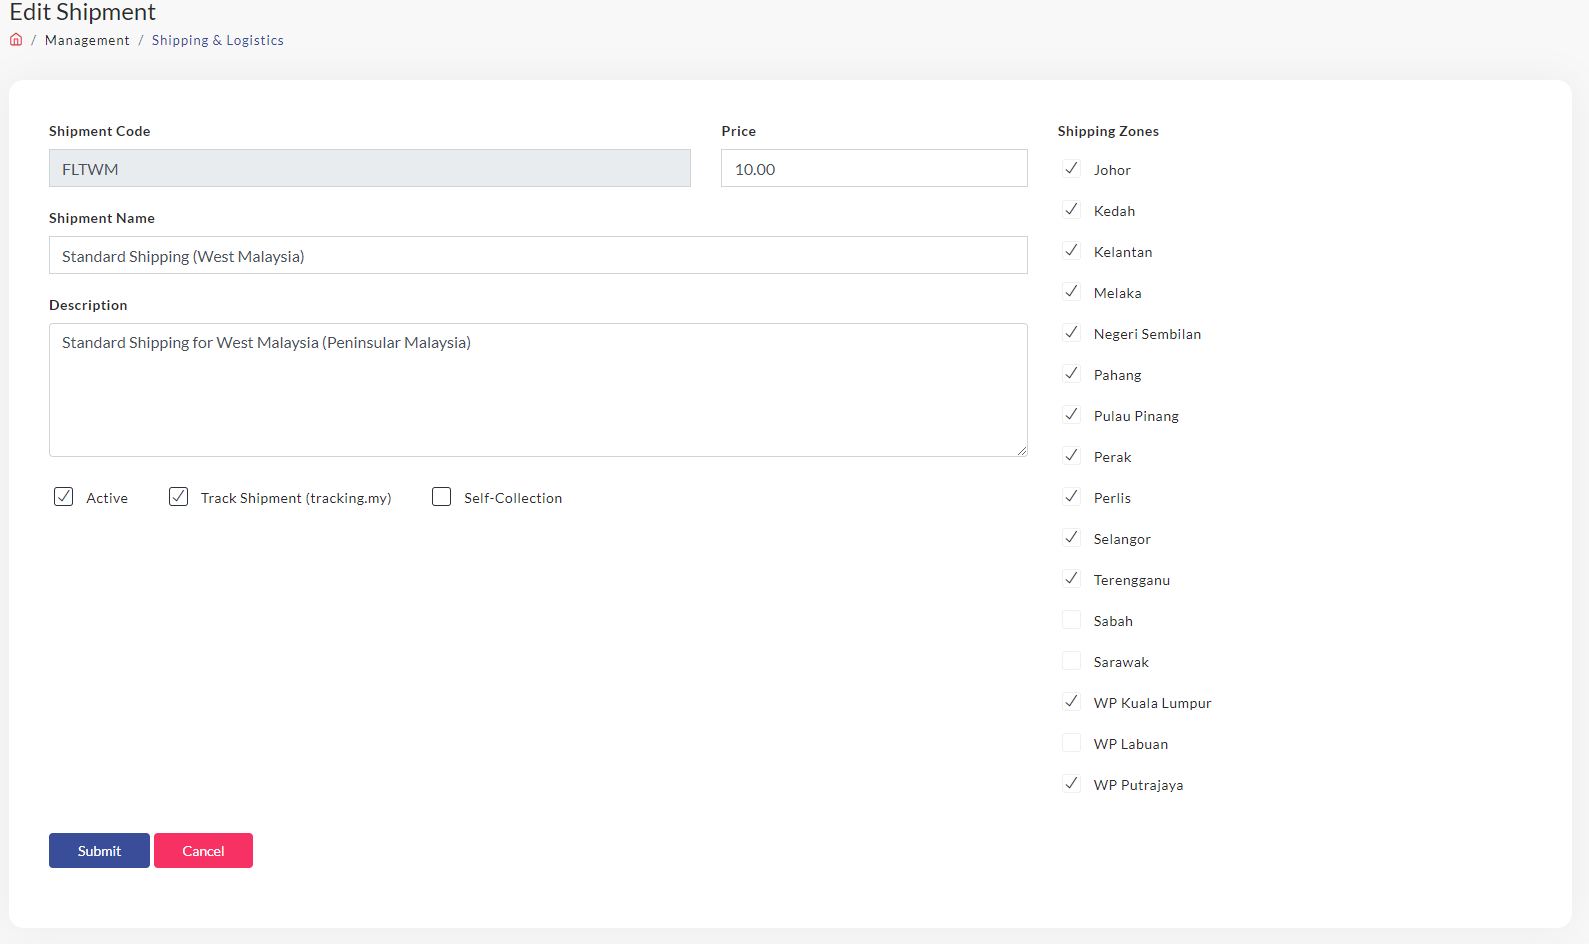
Edit Shipment
- From Manage Shipping and Logistics page, Click


- Edit Shipment page will appear, Edit the required information needed, then Click Submit.

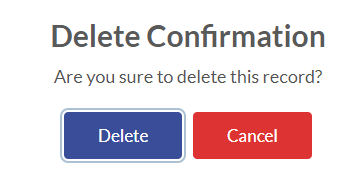
Delete Shipment
- From Manage Shipping and Logistics page, Click

- Delete confirmation pop up will appear. Click Delete to proceed.
System Logs
To view the System log,
- Click Management
- Click System Logs
- The log viewer will appear as below:
